Spapilot
Installation Manual.
Step by step, from unboxing to your first connected spa.
Introduction
Congratulations on your purchase of Spapilot, the smart spa controller designed to make your spa experience simpler, more energy-efficient, and fully automated.
Welcome to Spapilot Gen 1
Spapilot is more than just a spa controller. It is your partner in creating a sustainable and relaxing spa environment while saving both energy and money. This manual takes you step by step from unboxing to your first connected spa.

Key features
Why choose Spapilot
At Zavepower Innovative Technology AB, we believe in making life simpler. Spapilot is more than just a spa controller, it is your partner in creating a sustainable and relaxing spa environment while saving both energy and money.
Safety Instructions
To ensure safe and proper use of your Spapilot, please follow these important safety guidelines.
General safety precautions
- Read before use. Carefully read this manual before installing or using the device.
- Keep away from water. Avoid placing the device in direct contact with water to prevent electrical hazards.
- Supervision required. Children or individuals unfamiliar with the product should not operate it without supervision.
Use only the power adapter provided with the Spapilot. Using other adapters may cause damage or safety risks. Make sure the power outlet is not overloaded with other high-power devices.
Installation safety
- Proper placement. Install the Spapilot in a dry area, away from direct sunlight or extreme temperatures.
- Follow instructions. Always follow the installation steps provided in this manual to avoid improper setup.
Maintenance safety
Do not attempt to disassemble or repair the Spapilot yourself. Contact customer support for assistance.
If you notice unusual smells, smoke, or sparks, turn off the device immediately and unplug it, then contact customer support. In case of electric shock, seek medical attention immediately.
By following these safety instructions, you can ensure a safe and enjoyable experience with your Spapilot.
What's in the Box
Before getting started, please ensure that all components are included in your Spapilot package. If anything is missing, contact our support team immediately.
Included components
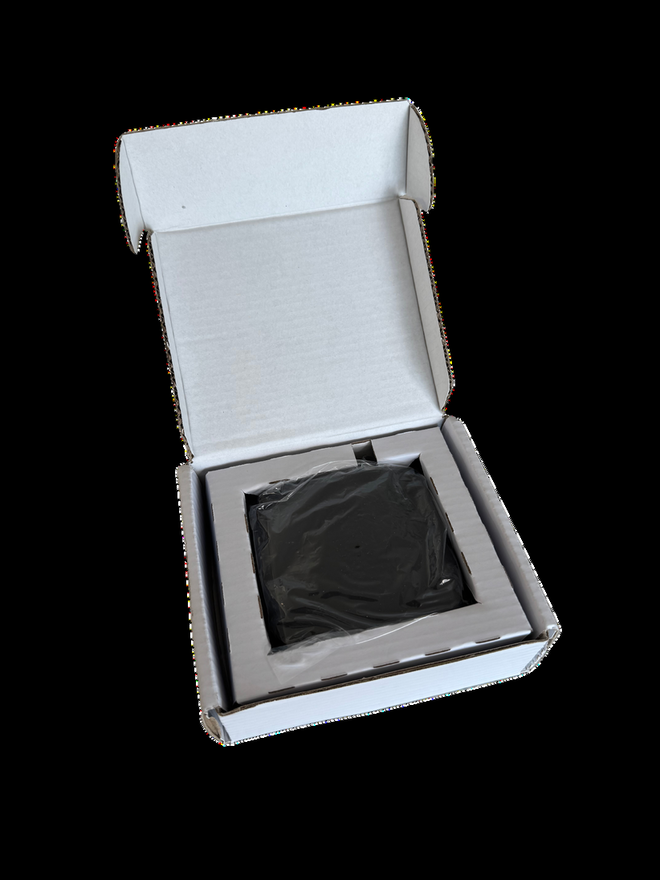
Make sure to keep the packaging and all components in case you need to return or exchange the product.
Installation Guide, Step 1: Prepare
Follow these simple steps to install and set up your Spapilot. Make sure to read the safety instructions before starting the installation.
Step 1: Prepare for installation
- Ensure your spa is powered off before starting the installation.
- Identify the brand and model of your spa's control box.
- Gather the Spapilot device.
- Prepare the tools needed to remove panels, the cover of the control box, and any other tools that are required.
- Have your Wi-Fi credentials ready if needed.
- Make sure that your router is not blocking new devices.
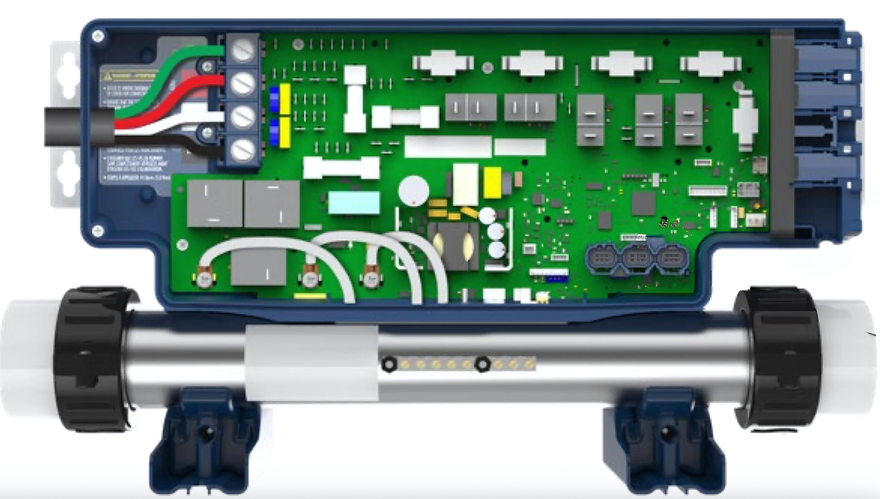
Step 2: Connect Spapilot to Your Spa
Connect the Spapilot to your spa's control box. The exact port depends on whether you have a Balboa BP or a Gecko IN.YE system.
- Remove the front cover Locate the control box, then remove the screws, generally 4 screws. Remove the front cover so you have full view of the circuit board.
- Locate the port for your version With the circuit board in full view, locate the connection port for your specific version, Balboa, Gecko, or other.
- Connect the Spapilot cable Connect the Spapilot cable to the designated port on your spa system. Depending on your system, the connection will be different. The diagrams below show the BP-Series and IN.YE-Series ports.
Zavepower has no commercial partnership with Balboa Water Group or Gecko. Any mention of the Balboa BP series or Gecko YE-3 and YE-5 is solely to clarify technical compatibility.
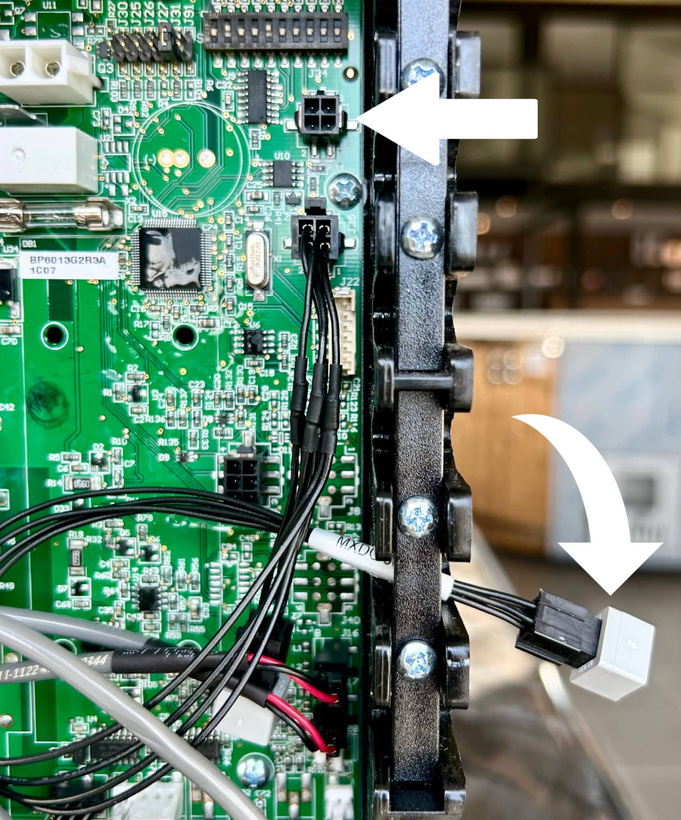

Align the cable connector carefully. Push it in straight, do not tilt. Inserting the connector at an angle may bend or break the pins.
Placement of the Spapilot Box
Recommended placement of Spapilot for the best Wi-Fi reception.
Place it high, facing the router
Place Spapilot as high as possible on the side of the spa that faces your Wi-Fi router. If it is difficult to reach, an extension cable is available for purchase.
Cut the foil-covered insulation to size
The insulation on the inside of the panel is usually covered with foil that lies directly against the panel. Cut out a piece of the insulation, including the foil, about the same size as the Spapilot unit, so that Spapilot can sit directly against the bare panel. Leave the insulation with foil everywhere else. Place Spapilot against the bare panel where the insulation has been removed, then put the insulation back over Spapilot as much as possible, but leave it open between Spapilot and the panel.
Foil and insulation significantly weaken the Wi-Fi signal. By removing the insulation and foil just where Spapilot sits, and placing the unit directly against the panel, the signal is greatly improved.
Extra tips
- If the signal is still weak, move the router closer to the spa or use a Wi-Fi extender.
- Avoid large metal objects between the spa and the router.
Wi-Fi Optimisation
A few simple checks will give you a stable connection between your spa and your router.
1. Check Wi-Fi coverage outdoors
Your home router is usually placed indoors, and its signal is weakened by walls and windows. Stand next to the spa with your phone and check the Wi-Fi signal. If you see fewer than 2 to 3 bars, the signal is likely too weak for the spa unit. Solution: move the router closer to the spa if possible, or install a Wi-Fi extender or mesh node inside the house, near the wall facing the spa.
2. Spa unit placement
The controller is mounted inside the spa cabinet, surrounded by insulation and water, which naturally reduces Wi-Fi signal strength. If possible, make sure the antenna is not fully blocked by metal or thick insulation. In difficult cases, an external Wi-Fi antenna can be added to improve reception.
3. Router configuration
- Make sure the spa connects to the 2.4 GHz Wi-Fi band. The device does not support 5 GHz.
- Use WPA2-PSK security mode, avoid WPA3.
- For best stability, set the Wi-Fi channel to 1, 6, or 11.
- Assign the spa a fixed IP address (DHCP reservation) in your router. This prevents disconnections when the router changes IP leases.
4. Power supply
The spa unit requires a stable power source. If it restarts unexpectedly, the Wi-Fi connection will also be lost. Make sure the spa's power supply is reliable and not overloaded.
5. Environment and interference
- Other wireless equipment, such as neighbouring Wi-Fi, Bluetooth devices, and wireless speakers, can interfere with the connection.
- Trees, rain, or snow between the house and the spa may weaken the signal.
- Place the Wi-Fi extender or mesh node so that it has clear line of sight toward the spa whenever possible.
Step 3: Connect to Wi-Fi
Power on the outdoor spa again and let the Spapilot power up. Then open the Spapilot app on your smartphone or tablet. Download it from the App Store or Google Play if you have not already.
Download the app
Search for Spapilot in the App Store for iOS or Google Play for Android, and install the app on your smartphone or tablet.
In the app
- Create a user account in the app.
- Log in, then tap Add new device.
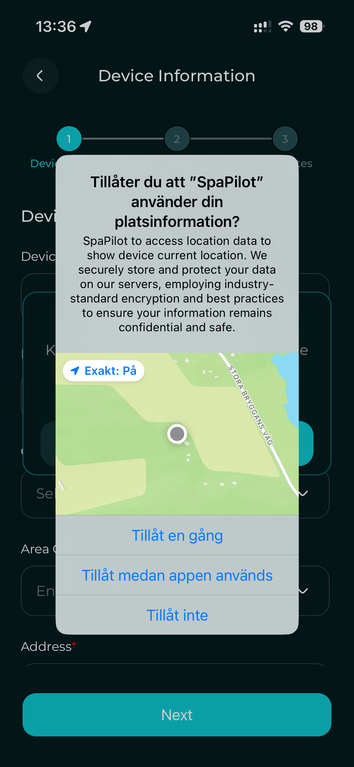
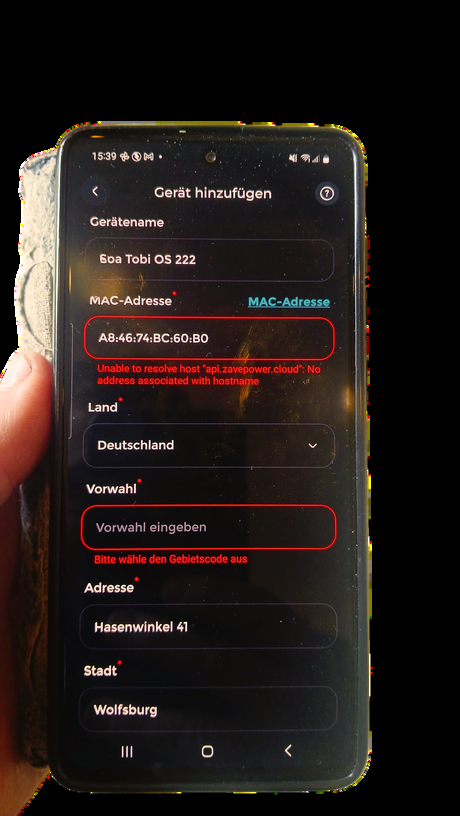
- Fill out the device name. When you reach the MAC address field, tap GET MAC ADDRESS and Spapilot will help you retrieve the ID from the device.
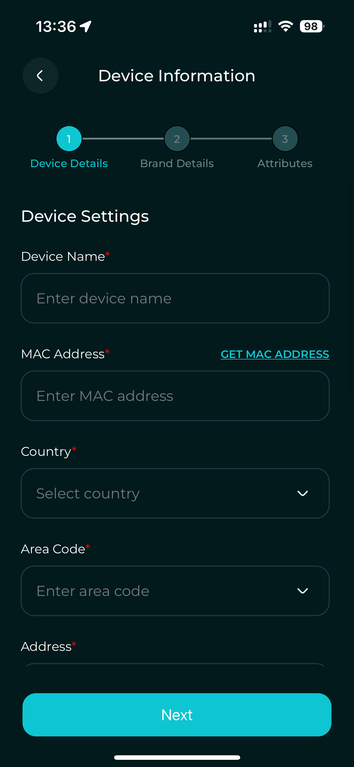
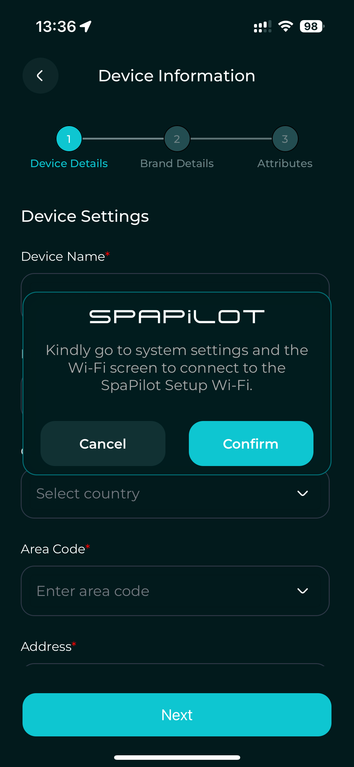
Do not connect to your home Wi-Fi before this step. Doing so can cause the setup Wi-Fi to disappear, and you may need to contact our support.
If you see a Wi-Fi network named SPAPILOT RESET HOTSPOT, this is not used for the initial installation.
Spa Setup Details
Now complete the details about your outdoor spa, including the pumps, heater, sanitation system, and any additional components. This is needed to calculate your usage and cost.
If you are uncertain about any specifics, we recommend reaching out to your local reseller or the manufacturer of your outdoor spa for assistance.
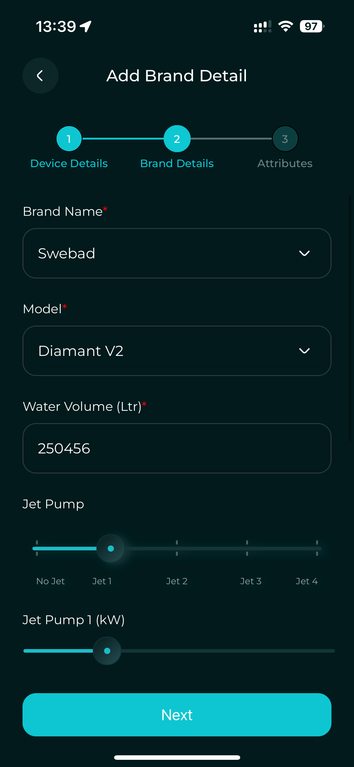
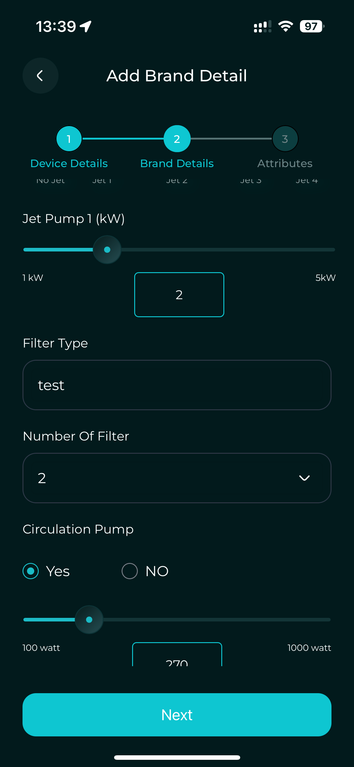
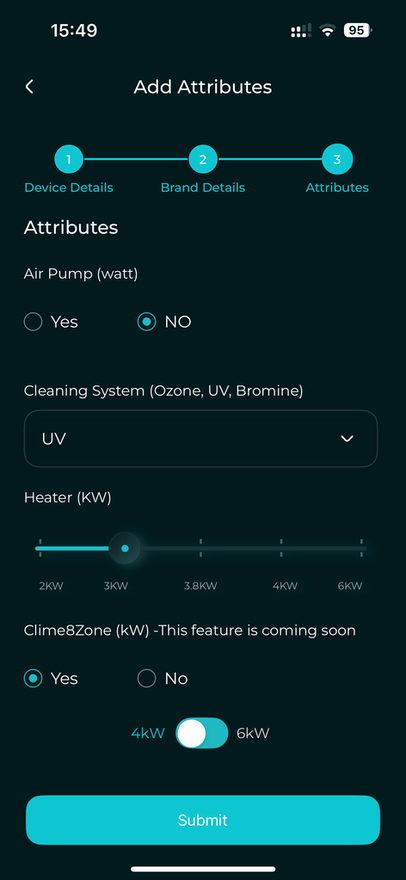
Then tap Submit to register your outdoor spa.
Understanding Filtration Cycles
In Spapilot, the system automatically initiates cleaning during the heating schedule. This means each time a schedule is set up, it filters just like a standard spa.
Extra filtration time
If you choose to add extra time based on your usage, that runs outside of Spapilot's cost control and operates according to your specified timings, which may incur additional costs.
We recommend a time between 00:00 and 06:00. Depending on your use, choose how many hours you need. 3 to 6 hours per 24 hours works for most users, but it can vary from user to user.
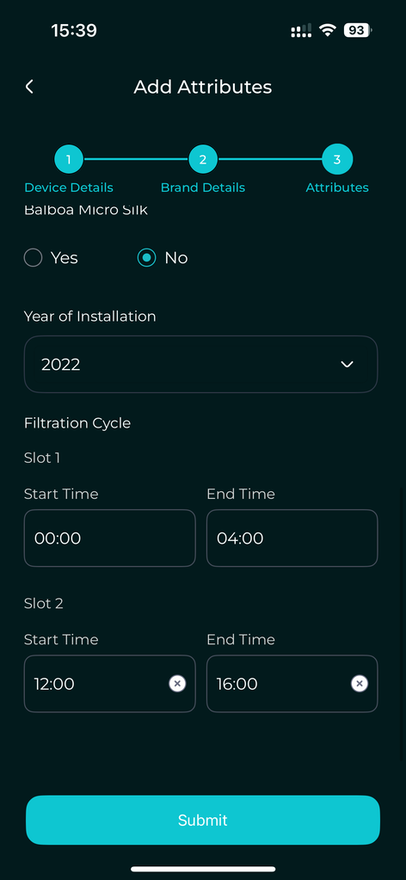
We will enhance this function to let you add a setting in the Planner, so you can incorporate filtration into cost control.
Setup Complete
The setup is complete, and your home screen should now appear.
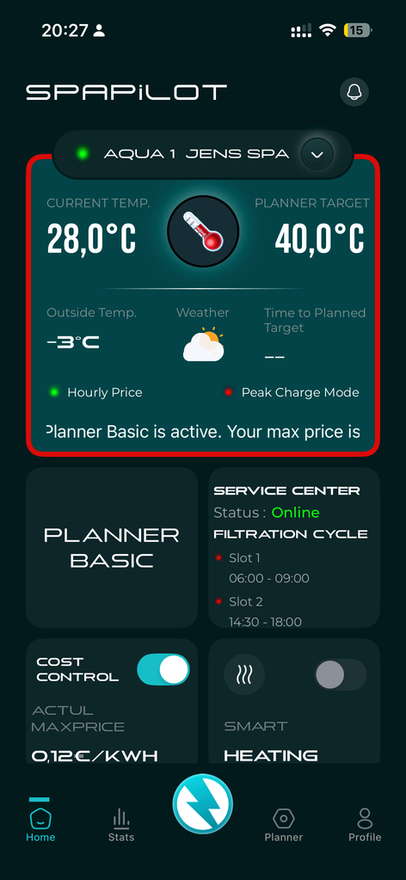
Continue reading the user guide to familiarise yourself with your Spapilot app and all of its features.
Updates
Your Spapilot receives updates in two ways.
Regular updates keep your Spapilot system secure, reliable, and current with the latest features. If you have any issues during the update process, refer to the troubleshooting section or contact our support team.
Technical Specifications
The key technical details of the Spapilot Box Gen 1.
Warranty and Support
Everything you need to know about your Spapilot warranty, support, environmental commitment, and certifications.
Warranty terms
Spapilot comes with a standard 24-month warranty. If you purchased the product through an authorized reseller, a 5-year warranty applies. The warranty covers manufacturing defects and operational issues under normal use. To make a warranty claim, contact our support team with your proof of purchase and the product's serial number.
Software warranty
The Spapilot software, including the mobile app and device firmware, is provided "as is" and is covered by a limited warranty. Zavepower guarantees that the software will function as described in the official documentation at the time of delivery. Zavepower is not responsible for issues caused by third-party software, operating system updates, or user modifications. Regular updates are provided to improve performance and security, but uninterrupted or error-free operation cannot be guaranteed.
Spapilot is designed to operate fully within the parameters allowed by the manufacturers' own systems. It connects via official ports and communicates solely through existing, approved interfaces, without affecting the safety, software, or hardware of the spa system. This means our product cannot affect the manufacturer's warranty. A warranty can only be impacted if a third-party product actually causes damage or interference, which is not the case with Spapilot. We are always open to cooperation with manufacturers and distributors to ensure full transparency and confidence for our shared customers.
Support and contact
Need help? Our support team is here for you.
Environment and recycling
At Zavepower, we care about the environment. Spapilot is designed to reduce heating costs by up to 80% and lower CO₂ emissions. When your product reaches end of life, please dispose of it at your nearest electronics recycling facility. Always follow local recycling guidelines.
Safety certificates and approvals
Spapilot is CE marked and RoHS compliant, meeting European safety and environmental standards. For more information about certifications, visit our website or contact our support team.
Quick Start Guide
Get started with your Spapilot Gen 1 in just a few simple steps.
FAQ
The most common questions about installing and connecting Spapilot, answered.
- Go to your mobile device settings and set your mobile hotspot to match these credentials. On iPhone, you change the hotspot name under Settings, General, About, and then Name. After that, go to Personal Hotspot, allow all devices to connect, and set the password above.
- Once your device connects to the hotspot, you can modify the box's credentials as needed.
- Balboa BP series. Support for BP series control boxes is available at launch. Examples of compatible models: BP601, BP6013G1, BP2100, BP7, BP8, and more. For a complete list, refer to Balboa's official documentation or contact our support team.
- Gecko YE-3 and YE-5 (coming soon). Support is planned for future updates and is not available at launch.
Troubleshooting
Here you will find help to quickly resolve common issues with your Spapilot.
- Make sure the power is properly connected.
- Check that the power outlet is working.
- Try unplugging the device, waiting a few seconds, and plugging it back in.
- Check that your Wi-Fi network is working for other devices.
- Ensure you are using the 2.4 GHz band, not 5 GHz.
- Move Spapilot closer to the router during initial setup.
- Make sure the Spapilot box is powered on and connected to Wi-Fi.
- Check that you are logged into the correct account in the app.
- Restart both the app and the Spapilot device. Turn off power to the spa and wait 10 seconds before turning the power on again.
- Check the Wi-Fi connection.
- Make sure your app is updated to the latest version.
- Restart the Spapilot app and try again.
- Make sure Spapilot is connected to both power and Wi-Fi during the update.
- Restart the device and try again.
- If the problem continues, contact support.
Visit our support page for more guides and video tutorials at www.zavepower.com/support. You can also contact us directly at support@zavepower.com.
Contact Directory
How to reach us for support, sales, reseller partnerships, and documentation.
Website: www.zavepower.com
Email: support@zavepower.com
The Spapilot Gen 1 is the inaugural version and is currently in its beta phase. As with any early version, there may be occasional issues that require troubleshooting. Our dedicated support team is committed to assisting you with any concerns or questions. We encourage all users to provide feedback, as your insights are invaluable in helping us refine and enhance the Spapilot experience. Thank you for being part of our journey toward innovation and excellence.
Please note: Zavepower has no commercial partnership with Balboa Water Group or Gecko. Any mention of the Balboa BP series or the Gecko YE-3 and YE-5 is solely to clarify technical compatibility.